A 5-Day Zion National Park Itinerary: The Best of Zion
Embark on an unforgettable journey with this 5-day Zion National Park itinerary! Located in the heart of the red rock landscape of Utah, Zion National Park is a dream for adventure seekers and nature lovers.
I have curated a detailed guide to help you navigate the best hiking trails in Zion, awe-inspiring viewpoints, and essential tips to make the most of your visit to Zion National Park.
From the exhilarating heights of Angels Landing to the thrilling trek through the Narrows, this 5-day Zion National Park itinerary promises an abundance of wonderful memories!
Disclosure: This post may contain affiliate links, meaning I will get a commission if you decide to purchase through those links, at no cost to you. Thank you for your support!
Tips for Visiting Zion National Park
Starting Your Day Early Sets Your Day Up for Success
Though it may seem counterintuitive on a vacation, waking up early is a must while visiting Zion National Park.
I recommend starting your days early around the time the first shuttle leaves from the visitor center. This guarantees you get parking at the visitor center and avoid having to wait in long shuttle lines.
Early starts ensure wrapping up your day by 3:00 pm or 4:00 pm, allowing you to beat the dinner rush at the restaurants in Springdale.
I recommend utilizing the Springdale shuttle from the visitor center to reach all of the places to eat in Springdale.
This allows you to keep your parking spot at the visitor center and avoid having to find parking in Springdale. We always got off at Stop 5 on the Springdale shuttle.
Download Offline Google Maps of the Area
Before arriving, ensure you download offline Google maps of the area so you are able to use your GPS when you do not have service. Learn how to set up offline maps here.
Zion Canyon Shuttle
The Zion Canyon Shuttle is how you will get around in Zion National Park. You no longer need a ticket or reservation to ride the shuttle.
It runs daily from March through November and during the holiday season in December. When the shuttle is in operation, you are not allowed to drive your own vehicle on the Zion Canyon Scenic Drive.
The shuttle line moves pretty fast due to how frequently the shuttle comes and the large amount of people it can hold.
Discover more about the Zion Canyon Shuttle schedule and details here.

Springdale Shuttle
If you are staying in Springdale or have to park in Springdale, the Springdale Shuttle is a great way to get to the visitor center.
Once you arrive at the visitor center, you will deboard the Springdale Shuttle and then get in line for the Zion Canyon Shuttle to enter into the park.
The Springdale Shuttle is free and does not require any ticket or reservation.
During some points of the year, the first Springdale shuttle is an hour later than the first Zion Canyon Shuttle in the park so do keep that in mind.
It does come less frequently than the Zion Canyon Shuttle. We usually had to wait around 15-20 minutes for it.
Find additional information about the Springdale Shuttle schedule here.
Navigate the Hiking Trails with the All Trails App
I recommend using the free version of the All Trails app to help you navigate the hikes in Zion National Park.
Make sure to save them on the app before entering the park since there is limited cell service.
The hikes on this Zion National Park itinerary are pretty easy to navigate on their own without using the All Trails app, but it is nice to have just in case.
It is also a good resource to find hikes in Zion you might want to do!
Zion National Park Entrance Fee
You can only get the Zion National Park Entrance Pass at the entrance station in person.
When we went into the park at 7:00 am, there was no ranger at the entrance station.
So, we did not need to purchase it until we left and came back walking through the park after going to Springdale.
Make sure to keep the pass with you at all times since you will have to show if you are exiting and reentering.
What to Pack for Zion National Park
Travel Backpack
If you are flying with a budget airline into Las Vegas, you might be wanting to avoid those pesky carry on fees like we did!
We flew with Allegiant and used this travel backpack as our personal item.
We were able to fit four days worth of clothes, one pair of slides, and our toiletries in this backpack. It fit well under the airplane seat too.
I highly recommend it! We got the X-Large version.
Collapsible Backpack
This collapsible backpack came in handy during our day hikes.
It held our waters, snacks, portable chargers, our jackets, and more!
Due to its collapsible nature, it made it easy to pack in our travel backpack.
Hiking Boots
Good hiking boots are essential to pack for your trip to Zion National Park.
I highly recommend these hiking boots as they did not require any break in time.
They are frequently on sale making them an affordable option.
Jacket/Sweatshirt
If you are coming when the weather is cooler in the mornings, I highly recommend bringing a light jacket or sweatshirt to wear until it warms up.
Portable Phone Charger
A portable phone charger comes in handy to make sure your phone stays charged when you don’t have access to outlets during the day.
Sunscreen
Sunscreen is a necessity to keep your skin protected from the sun as there is not many places with shade.
Check out these 40 carry-on packing tips to save space in your luggage!
Keep the Time Change in Mind
Keep in mind the time zone difference, with Las Vegas on Pacific Time and the area near Zion National Park on Mountain Time.
Therefore, Las Vegas is one hour behind Zion.
Keep this in mind when planning your arrival and departure days on your Zion National Park itinerary to avoid any confusion or mishaps.
How to Get to Zion National Park
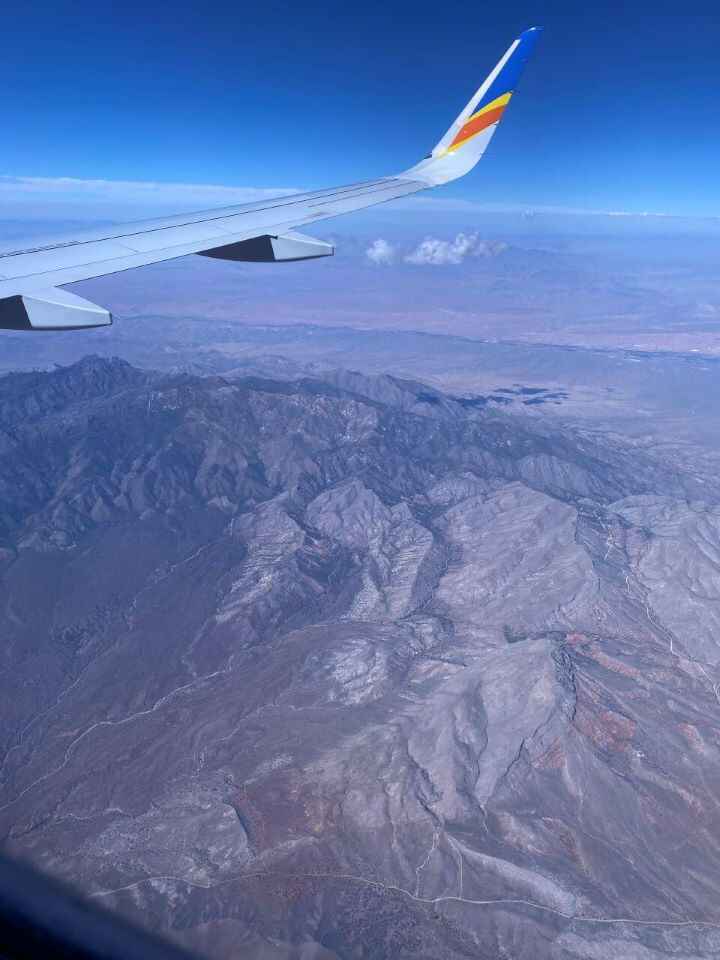
The closest major airport to Zion National Park is the Las Vegas Airport (Harry Reid International Airport).
The drive from Las Vegas to Zion National Park took us around 2 ½ hours, and it is an easy drive with wonderful scenery along the way.
I highly recommend filling up on gas and getting food before leaving Las Vegas as there are not many cities along the way until you get closer to Zion National Park.
Check out 23 things to do on long flights to pass the time – some you might not have thought of before!
How Long to Stay in Zion National Park
I recommend planning your Zion National Park itinerary for a minimum of two days, preferably 3 days.
Preferably, plan your visit during weekdays to bypass peak weekend crowds.
The length of your trip will depend on the hikes in Zion National Park you are wanting to do.
For us, we knew we wanted to hike Angel’s Landing, the Narrows, and Observation Point. Since each of these are longer hikes, we knew we wanted to do each hike on separate days.
If you will be in the area longer than three days, I recommend making a day trip to Bryce Canyon National Park.
The drive from Zion National Park to Bryce Canyon National Park only takes about 1 ½ hours – 2 hours depending where you are staying.
Zion National Park is one of the smaller national parks at 232 square miles. For reference, Yellowstone National Park is 3,472 square miles – making it almost 15 times bigger than Zion National Park!
Therefore, you really only need a couple days to get the most out of your trip to Zion!
If you’re thinking of adding a day trip to Antelope Canyon to your itinerary, be sure to check out my blog post about the journey from Zion National Park to Antelope Canyon.
Getting a Rental Car
You must have a rental car while visiting Zion National Park. We got our rental car at the Las Vegas Airport.
We booked our rental car through Expedia and chose the cheapest option which was from Easirent.
The Las Vegas Airport has a shuttle that takes you to the rental car center where you will be able to check in with your rental car company.
The rental car center has several car rental companies which are listed here.
There are also several “off site rental car companies” that have their own shuttles that pick you up from the rental car center to take you to their location. This is what we had to do with our rental car company, Easirent.
Your rental car booking confirmation email should have this information and how to contact the company to get a shuttle if yours is also off site.
Some are actually within walking distance from the rental car center but some are further and would require a shuttle.
Overall, I do not recommend booking with Easirent. They were the cheapest when we booked through Expedia, but we had to pay an out of state fee which was an additional $25 that we were not made aware of when we initially booked.
This is due to them not having a location in Utah in case we were to get in an accident and they would have to come retrieve the car.
They also seemed to be the most infrequent in coming to pick you up from the rental car center. We waited about 45 minutes while most other rental car company shuttles came every 10 minutes.
The Best Time to Visit Zion National Park
Spring
For cooler temperatures and fewer crowds, the spring months are an excellent time to visit Zion National Park.
The only downside is that the Narrows tends to be closed during the spring months due to its high flow rates.
If you are visiting in May, you have a higher chance of the Narrows being open.
Summer
Prepare for peak crowds in Zion National Park during the summer months, especially from Memorial Day to Labor Day.
Don’t let this deter you from booking your trip to Zion! It is just important to be aware of when planning your Zion National Park itinerary to ensure you have the best experience.
The weather in Zion during the summer can have some extreme temperatures with highs during the day reaching over 100 degrees.
A way to work around this is to get to the park early, around 6:00 am when the first shuttle starts. This guarantees you get a parking spot in the visitor center and that you can get your hike done before the hot temperatures arrive.
Many decide to take a long lunch break and go back to their hotel to relax and/or take a nap during the afternoon when the sun is the strongest. Then, go back to the park in the evening when it has cooled down.
A great advantage of visiting Zion National Park during the summer is the longer daylight hours giving you more time to explore the park!
Fall
The best time to visit Zion National Park is during the fall specifically in October and November. This is when the summer crowds begin to die down and cooler/moderate temperatures arrive.
If visiting during the middle of October, be mindful that there could be larger crowds due to schools being on fall break.
We visited Zion National Park during October 9th – 13th and experienced the fall break crowd, but it is nothing compared to the summer crowds.
When we visited during mid October, the temperatures in the morning were in the 40s and 50s and reached the 70s and low 80s during the day.
Winter
Winter is also a great time to visit Zion National Park if you are okay with the colder temperatures.
The crowds are at their lowest (except during the holiday season) and you are able to drive your own vehicle through the park since the shuttles are not operating.
If you are planning to hike Angel’s Landing, beware that the trail can get icy resulting in slippery/dangerous conditions.
Looking for a Hotel?
Explore Booking.com for your hotel needs – they offer budget-friendly prices and a variety of room types!
Need a Rental Car?
For all your rental car needs, head over to Expedia! It’s user-friendly and offers plenty of affordable options!
Guided Tours/Activities
When it comes to booking guided tours and excursions, my top pick is Get Your Guide!
Where to Stay Near Zion National Park
We booked our stay only about 2 months in advance, limiting our options since some hotels near Zion National Park were already fully booked or prices had been increased.
I recommend booking further in advance to ensure availability and lower prices.
Airbnbs Near Zion National Park
We stayed at an Airbnb in Virgin, Utah and I would highly recommend it if you are looking for a place to stay for two people.
It was about a 25 minute easy drive to the park, and it was significantly cheaper than staying in Springdale or in the park.
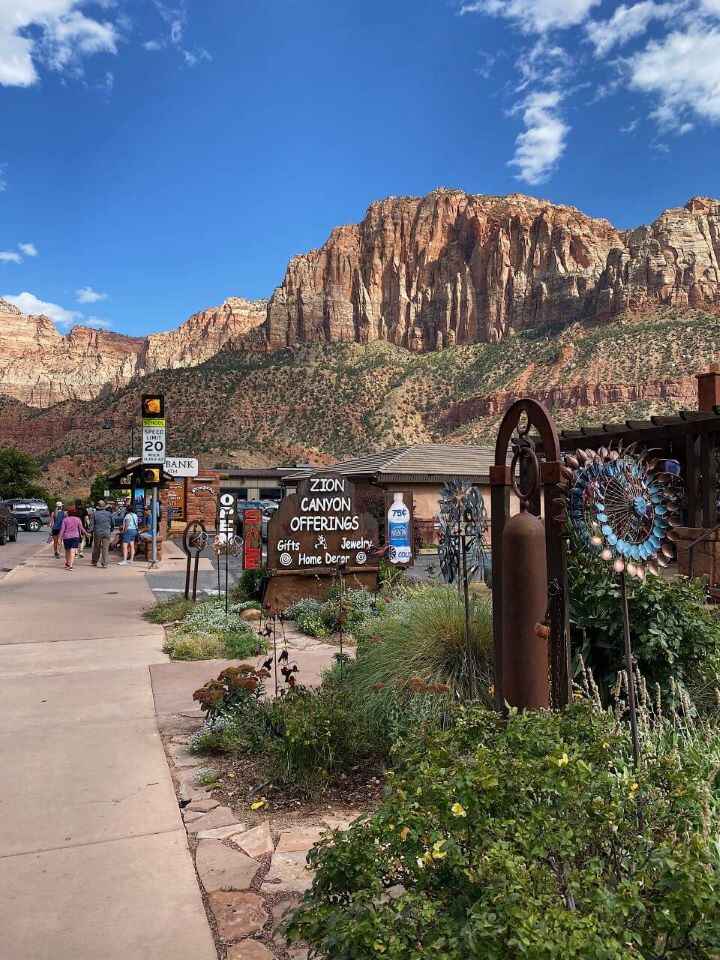
Hotels in Springdale
Springdale is definitely the best city to stay in on your visit to Zion National Park.
It is located right outside of Zion National Park making it easy to walk into the park, allowing you to avoid the stress of parking at the visitor center.
Springdale also has its own shuttle that will bring you to the visitor center at Zion National Park steps away from boarding the Zion Canyon Shuttle.
Springdale has the most options of places to eat making it a convenient place to stay. Due to its convenience, the hotels in Springdale come with a price tag.
Make sure to book your accommodations well in advance to ensure availability and lower prices.
Here are a few hotels in Springdale I recommend:
SpringHill Suites Springdale Zion National Park
Cliffrose Springdale, Curio Collection by Hilton
Hampton Inn & Suites Springdale/Zion National Park
Holiday Inn Express Springdale
The Zion Lodge
Zion Lodge is a very popular place to stay in Zion National Park, and it usually books up within a year in advance!
Zion Lodge is the only hotel located inside the park, and it even has its own shuttle stop along the Zion Canyon Shuttle route.
It offers the convenience of being located in the park, and it even has its own restaurant.
Check out these 10 places for glamping near Zion National Park to experience glamping under the stars!
5-Day Zion National Park Itinerary
This detailed 5-day Zion National Park itinerary includes 3 full days exploring Zion with 2 days for arrival and departure.
Day 1 – Head to Zion National Park & View the Sunset
You can customize this itinerary based on when you arrive in Las Vegas.
We landed in Las Vegas around 12:30 pm.
Lunch at Tacos El Gordo
After picking up our rental car. which took about 2 hours total, we stopped for lunch at Tacos El Gordo which serves up great authentic street tacos.
They are smaller tacos, and I would recommend getting 5 tacos each especially if you are hungry!
It is pretty expensive at around $4/taco but sooooo worth it! I recommend the pork tacos.
You get in line based on what meat you want.
We went to the 2560 W Sunset Road Las Vegas, Nevada 89119 location since it was closest to the airport.
It had plenty of parking and was not busy around 2:00 pm on a Monday.


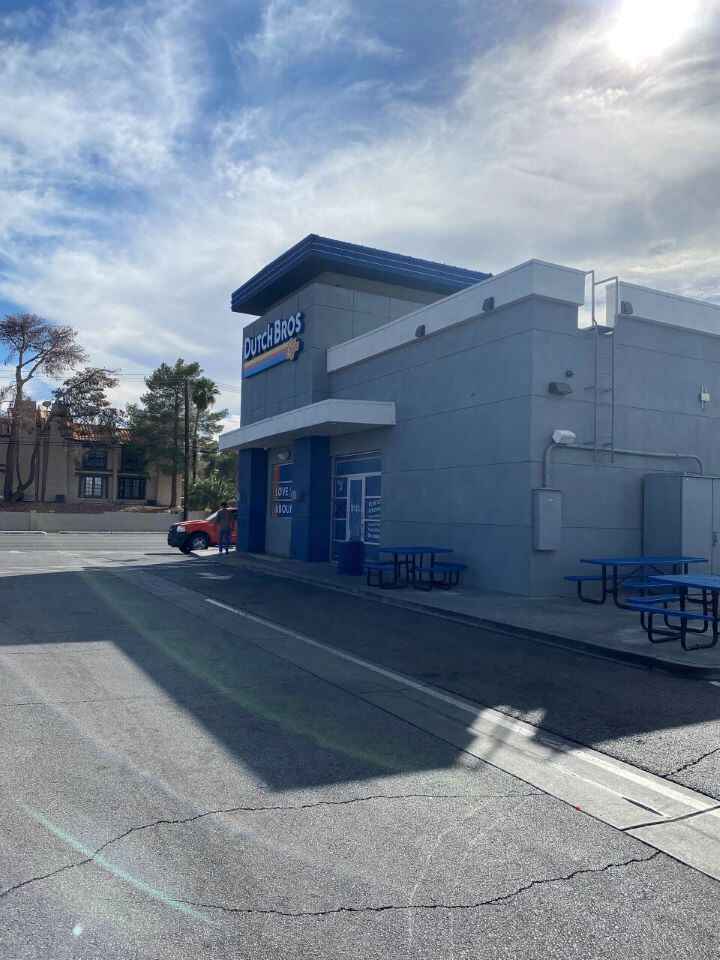
Grab a Coffee at Dutch Bros Coffee
I couldn’t miss making a stop for coffee at Dutch Bros Coffee! I have always wanted to go there since there are none where I am from.
Their cold brew with soft top is great!
We went to the 2840 E Tropicana Ave Las Vegas, Nevada 89121 location.

Drive to Zion National Park
The drive from Las Vegas to Zion National Park took us around 2 ½ hours.
It was a relatively easy and straightforward drive offering wonderful scenery along the way.
Make sure to fill up on gas before starting on your drive as you do not pass many places to fill up on gas along the way.

Go to the Grocery
Since we were staying in Virgin, Utah, we did our grocery shopping at Davis Food & Drug which offered all of the essentials we needed.
We ate out for all of our meals on our trip, but we did stock up on water and snacks to have at our Airbnb and for our hikes which I highly recommend doing.

Dinner at River Rock Roasting Company
If you are staying near Virgin, Utah, I highly recommend having dinner at River Rock Roasting Company!
It has a plethora of outdoor seating and offers great views to enjoy.
I recommend the Bacon Cheeseburger and Margherita Pizza.


View the Sunset on the Pa’rus Trail
We didn’t have the time to do a sunset hike but if you do, I recommend viewing the sunset in Zion National Park on a hike along the Pa’rus trail.
This trail is accessible from the Zion Visitor Center, and there are signs pointing you to where the trail begins. Therefore, you do not need to take the shuttle to it.
It is an easy paved 3 mile hike and dogs are allowed on this trail.
When we left the park most days around 4:00 pm – 4:30 pm (this was on weekdays), there were several empty parking spots.
So, if you are arriving at the park in the evening, you might have luck with getting a parking spot in the visitor center since most people will be leaving for the day.


Day 2 – Hike to Scout’s Lookout & Angels Landing
6:00 am – Breakfast & Coffee at Deep Creek Coffee Company
I know this sounds like an early morning, but trust me when I say that it is crucial to start your mornings early here to make sure your day goes smoothly with finding parking and avoiding the crowds/traffic.
Deep Creek Coffee Company was our favorite place to grab breakfast and coffee near Zion! It is located in Springdale which is only a 5 minute drive to the visitor center.
It opens early at 6:00 am which was very convenient for us since we wanted to start our day early.
They have pretty limited parking with around 6 parking spaces, but we never had an issue getting a spot when we arrived a little after 6:00 am.
I don’t think you can go wrong with what you get here, but I highly recommend the following:
- Moki Smoothie
- Breakfast Burrito
- Bagel Sandwich
- Caramel Macchiato
- Vanilla Latte
- PB & Banana Toast


Get to the Zion Visitor Center Around 7:00 am
We visited October 9th – 13th during the week on Tuesday, Wednesday, and Thursday.
When we arrived at the Zion Visitor Center around 7:00 am, there was one big parking lot section that was pretty empty but filling up steadily.
I recommend getting to the visitor center by 7:15 am – 7:30 am to make sure you are guaranteed to get a parking spot.
If you are visiting on the weekend, I would get there closer to 7:00 am to guarantee you get a parking spot.
If you don’t get parking at the visitor center, you can park in Springdale and walk into the park or take the Springdale shuttle to the visitor center.
Most of the parking in Springdale you have to pay for, but we did find a parking lot behind Zion Pizza & Noodle Co that was free and did not have any signs indicating you could not park there. So, check out that area if you are looking for free parking in Springdale.
Hike to Scout’s Lookout & Angels Landing (permit required)
If you did not get a permit for Angels Landing or do not want to hike it, I still highly recommend including the hike to Scout’s Lookout on your Zion National Park itinerary.
You do not need a permit to hike to Scout’s Lookout.

Scout’s Lookout is the area before Angels Landing starts. It offers great views of the park, and it is a fun and challenging hike.
I recommend starting the hike to Scout’s Lookout/Angels Landing early in the day to avoid the crowds and allow you to enjoy most of the hike in the cooler morning temperatures.
We started around 7:45 am since we were able to get on the second shuttle. You will get off at Stop 6 (The Grotto) to start the hike.
It was challenging due to the switchbacks notoriously known as “Walter’s Wiggles!” We did see people of all ages doing this hike so it is doable!

There are restrooms and water fill up stations at the Grotto stop if needed before you start your hike.
We applied for the day before Angels Landing permit, and we were lucky enough to get a permit!
Even though the lottery is primarily luck, here are some tips to increase your chances on receiving a Angels Landing permit
- When you apply for a permit, it will have you fill out up to 7 choices. Make sure to fill all of these out to increase your chances.
- You can choose start times from before 9:00 am, 9:00 am – 12:00 pm, and after 12:00 pm.
- The before 9:00 am start time is the most popular time slot.
- I did 5 out of the 7 choices as before 9:00 am start time, then for the 6th choice chose the 9:00 am – 12:00 pm, and then for the last choice the after 12:00 pm start time. We ended up getting the after 12:00 pm start time.
- If two or more of you are going, have each of you apply for a permit to increase your chances.
- You can add up to 6 people onto one permit when applying.
- If you will be in Zion during the week, apply for a permit on a week day instead of the weekend to increase your chances.
Here is where you can apply for the Angels Landing permit.
If you do receive a permit for Angels Landing, make sure to either print it out and carry it with you or screenshot the confirmation email to show the ranger before starting the hike up the chains.
I recommend screenshotting as you will most likely not have cell service to pull up your email.
Once at Scout’s Lookout or when you are done with Angels Landing, I recommend continuing on to the West Rim trail for a little bit.
The West Rim trail offers several great viewing points, and it is way less crowded since most hikers do not seem to venture this way.

We continued to hike along the West Rim trail to kill time until we could start Angels Landing with our after 12:00 pm permit.
There are several spots to sit and relax at the top of Scout’s Lookout or on the West Rim trail to enjoy a snack and water break before starting Angels Landing or your hike back down.
We were able to start Angels Landing a little before our permit start time around 11:45 am. This is probably dependent on the park ranger who is working at that time and how busy it is.

If you are wanting to do a second hike, I recommend the Emerald Pools trail which also starts from Stop 6 (It used to be from Stop 5 but not anymore).
This could be a good hike to do before Scout’s Lookout/Angels Landing if your permit is not until the after 12:00 pm start time.
The Emerald Pools Trail is a very popular hike in Zion so be aware that there might be a crowd. We did not do this hike, but we heard this from others who did this trail.
Pick Up Rental Gear for the Narrows Tomorrow
If you are planning on doing the Narrows hike the next day, I recommend picking up your rental gear from Zion Outfitters the night before.
You are able to do so the day before from 4:00 pm – 8:00 pm so you are ready to go in the morning!
We booked our rental gear a couple days before our hike through Zion Outfitters website.
I highly recommend renting from Zion Outfitters since they are located right outside of the Zion National Park entrance making it a convenient stop to pick up and drop off your gear.
Since we were visiting Zion in October, we rented the Dry Pants Package.
Once we arrived to pick up our rentals, they said they were not renting out the dry pants package due to the water levels being chest high which would cause the pants to flood.
Therefore, we paid the extra $6/each for the Dry Bib Package which comes with a dry bib (like overalls), neoprene socks, water shoes, and a walking stick.
I HIGHLY recommend getting this package in October as the water was pretty cold (around 50 degrees Fahrenheit) and chest deep in some areas (I am 5’6” for reference).
If you are starting the Narrows hike in the morning, it will be pretty cold starting out since the sun does not shine into the Narrows until early afternoon.
I wore leggings and a light sweatshirt under my dry bib, and it was perfect. It is also not a bad idea to pack gloves in case your hands get wet/cold.
I highly recommend starting the Narrows hike around 8:00 am to avoid the crowds. When we started our hike back around 11:00 am, there were large crowds of people beginning the hike.
Dinner at Oscar’s Cafe
Oscar’s Cafe is one of the most popular places to eat in Springdale for a good reason! They serve a wide variety of food from burritos, burgers, and more.
I highly recommend the chips with salsa & guacamole and the chicken & chorizo burrito.
It is definitely pricier since it is a tourist restaurant but worth it!

Day 3 – Hiking the Narrows
6:00 am – Breakfast & Coffee
Not to be repetitive but we did have breakfast & coffee at Deep Creek Coffee Company each morning we were there!
I highly recommend it as it has yummy food, great coffee, and is reasonably priced.
If you are looking for a different place to have coffee & breakfast, I did try coffee at FeelLoveCoffee one afternoon and the coffee was really good.
I got the Vaughn Gogh latte which has caramel, vanilla, and honey. It is a sweet coffee drink and super yummy!
The downside is that this place is a little too expensive for me to justify – it was over $7 for my 16 ounce latte!!

7:00 am – Arrive at the Visitor Center & Start the Narrows Hike
Take the Zion Canyon Shuttle bus to Stop 9 (Temple of Sinawava) to start your hike to the Narrows.
Since the Narrows is the last stop on the shuttle bus, it takes around 45 minutes to get there.

We opted to carry our dry bib with us and put it on once we got off the shuttle bus.
I do recommend bringing slides or flip flops in your car to change into after the hike so you can get out of those water shoes!
To start the hike to the Narrows, you walk along the Riverside Walk which is paved until you reach the end and can enter the Virgin River to begin the walk through the water!
This map of the Narrows came in handy to know where the iconic sights are along the way.
We turned around once we reached the Wall Street area as the current started to get pretty rough.
In total, we hiked around 4 hours which was just the right amount of time for us.


Before you go, make sure to check if there are any flash flood warnings in the area.
You do not want to hike the Narrows if there are flash flood warnings in the surrounding areas since this can create dangerous conditions. You can check if there are flash flood warnings here.
You can check the flow rate of the Virgin River here. If the cubic feet per second exceeds 150, then the Narrows will close. This happens often in the spring due to the snow melting and running off into the Virgin River.
Please be aware that toxic cyanobacteria has been found in the Virgin River (which is the river you hike through in the Narrows). Check the current conditions here.
It is recommended to avoid submerging your head underwater and you can not drink the water (even if you filter it).
Eat at Meme’s Cafe
Meme’s Cafe is a great local, homestyle restaurant in Springdale.
I highly recommend the Teriyaki burger – sooo good!!


Day 4 – Sunrise at Zion Canyon Overlook and Hike to Observation Point
View the Sunrise at Zion Canyon Overlook
I recommend getting to the Zion Canyon Overlook parking lot around 6:30 am which is around an hour before sunrise in October.
Parking here fills up fast since there are limited spots.
The main parking lot for this trail is immediately to the right once you exit the tunnel.
If there is no parking, you can continue on and will find other parking spaces along the way or pull outs where you can park on the side of the road. This is what we had to do since we did not get there until around 7:00 am.
The Zion Canyon Overlook trail is only 1 mile round trip and relatively easy with some steep parts that got my heart rate up!
Once at the view point, the view of the sunrise is spectacular!
This trail offers one of the best views in Zion with the least amount of work.

Head to East Zion Adventures to Take the Shuttle to Observation Point
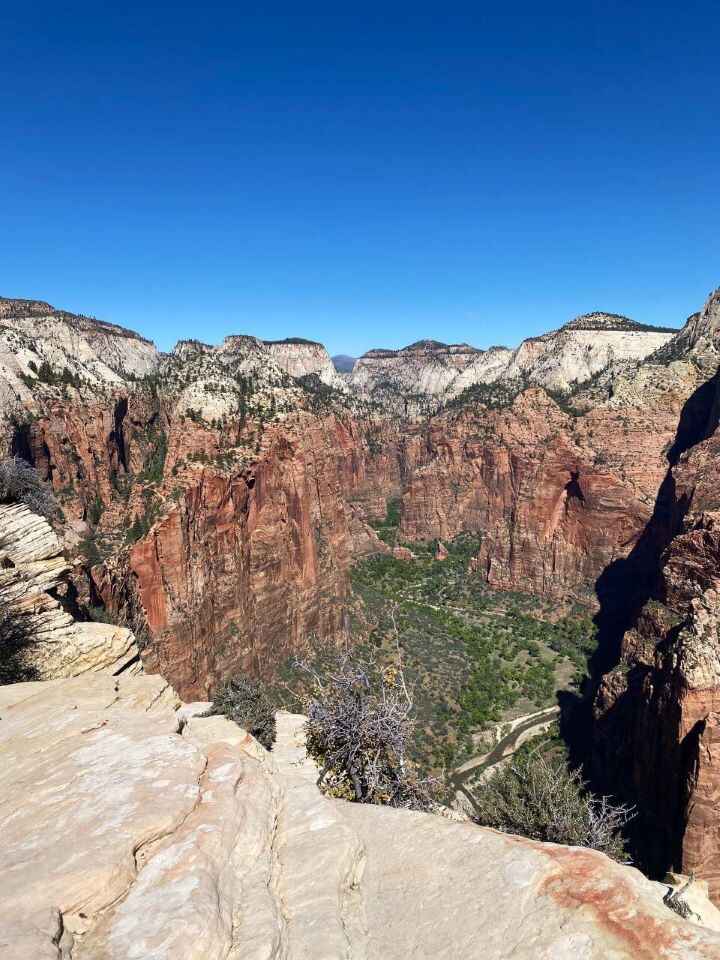
Observation Point is arguably one of the best hikes in Zion National Park for its outstanding view at the top!
You are able to see down the Zion Canyon and see the top of Angels Landing from way up high.
You used to be able to hike to Observation Point from the Weeping Rock trail in the park. Due to a rock slide that occurred in 2019, the trail to Observation Point is now closed from inside the park.
You can still reach Observation Point via the East Mesa trail but the Zion Canyon Shuttle bus does not take you to this trail.
Therefore, you either have to drive your own car to the trail head (which I do not recommend) or take a shuttle bus from East Zion Adventures which is what we did!
I do not recommend taking your own car because the road leading up to the trail head is in very rough shape. You do not want to risk damaging your rental car.
To keep your trip stress-free, I recommend booking a shuttle with East Zion Adventures that only costs $6/person to take you to the East Mesa trailhead.
I booked it online two days beforehand.

I recommend doing the 9:30 am shuttle time to give you ample time to drive there and check in so you don’t have to rush your sunrise viewing at the Zion Canyon Overlook.
The East Mesa trail is roughly 7 miles round trip and does have some gradual inclines during parts of the hike – especially on the way back.
Even though it takes some additional work to get to Observation Point now, I still highly recommend including it in your Zion National Park itinerary.
Make sure to download offline Google maps of the area before your trip because we did not have service once inside the park and on our drive to East Zion Adventures.
My offline Google Maps came in handy to get us there.

Dinner at Zion Pizza & Noodle Co
Zion Pizza & Noodle Co is a great place to eat in Springdale after a long day of hiking. I recommend the Chicken Parmesan and The White Sun Pizza!
Please note they open at 4:00 pm.
They have a pretty large, free parking lot if you continue past the smaller lot.


Day 5 – Head Back to the Las Vegas Airport
Keep in mind the time change when traveling back to Las Vegas from Zion National Park since you will gain an hour when arriving in Las Vegas.
We slept in this morning since our flight did not leave Las Vegas until 3:30 pm.
Breakfast/Lunch & Coffee at PublicUs
We decided to grab breakfast and coffee at PublicUs in the Las Vegas’s Fremont East District area, and it did not disappoint!
I recommend the Death Cream (if you like sweeter coffee), Brekkie Burrito, and Brekkie Sandwich!

We gave ourselves three hours to return our rental car and get through security at the Las Vegas Airport which proved to be more than enough time but better safe than sorry!
I hope this extensive five-day Zion National Park itinerary gives you inspiration when planning your own trip to Zion.
From the breathtaking sunrise at Zion Canyon Overlook, the exhilarating trek through the Narrows, the unparalleled views from Observation Point, and the adrenaline-pumping hike on Angel’s Landing, Zion is bound to leave you with an everlasting impression.


8 Comments